Embedded code installation
With this installation method, you embed the build files within your project. The build files can be integrated into any frontend framework.
If you use the embedded method, you can include additional functionality using React.
Prerequisites
Before you install the component in your project, regardless of framework, first prepare the build:
- Download the zip file of our source code for resusable components.
- Open the downloaded package on your favorite IDE (Integrated development environment)
- Open a terminal from the downloaded folder
- Run
npm install -
Build the reusable components:
-
US:
- To build the component with a Storybook page, run
npm run build:prod2, or - To build the component independently, run
npm run build-minimal:prod2
- To build the component with a Storybook page, run
-
EMEA:
- To build the component with a Storybook page, run
npm run build:prod2de, or - To build the component independently, run
npm run build-minimal:prod2de
- To build the component with a Storybook page, run
A new folder
WWWis created in the project. This folder contains all the build files needed for integration. -
- Copy the
WWWfolder and paste it in your project. -
Install based on the framework:
Vanilla JS installation
This section describes how to embed the reusable component when your project uses the Vanilla JS framework. Before starting, make sure you’ve fulfilled the prerequisites.
Installation steps
- Import
www/build/cloud-ui-components.esm.jsinto your HTML. -
Add this to all HTML files that will include the component.

-
Use the relevant component in your HTML.

-
Next steps: configure and customize the component
Note
It's important to configure the required parameters, and any optional parameters that you want to customzie. Make sure you read the documentation for the specific component you're integrating before implementing.
Lytx regularly updates the component-specific documentation as we continue to develop and improve related parameters and other functionality.
You’re there!
React installation
This section describes how to embed the reusable component when your project uses the React framework. Before starting, make sure you’ve fulfilled the prerequisites.
Installation steps
-
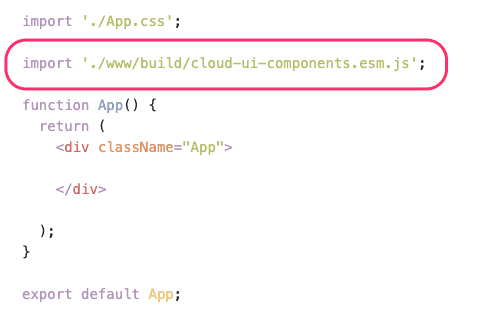
Import
www/build/cloud-ui-components.esm.jsinto your HTML for all HTML pages in your app that you want to integrate.Example
-
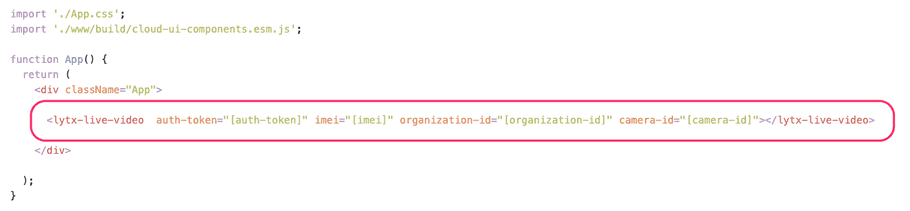
Add the component in all relevant places within your app. For example:
src/app/app.component.htmlExample
-
Next steps: configure and customize the component
Note
It's important to configure the required parameters, and any optional parameters that you want to customzie. Make sure you read the documentation for the specific component you're integrating before implementing.
Lytx regularly updates the component-specific documentation as we continue to develop and improve related parameters and other functionality.
You’re there!
Angular installation
This section describes how to embed the reusable component when your project uses the Angular framework. Before starting, make sure you’ve fulfilled the prerequisites.
Installation steps
-
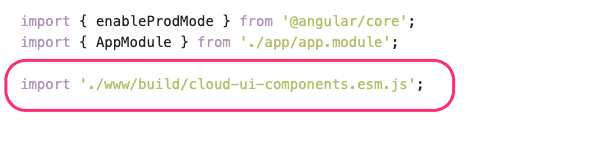
Import
www/build/cloud-ui-components.esm.jsinto your HTML for all HTML pages in your app that you want to integrate.Example
-
Add the component in all relevant places within your app. For example:
src/app/app.component.htmlExample

-
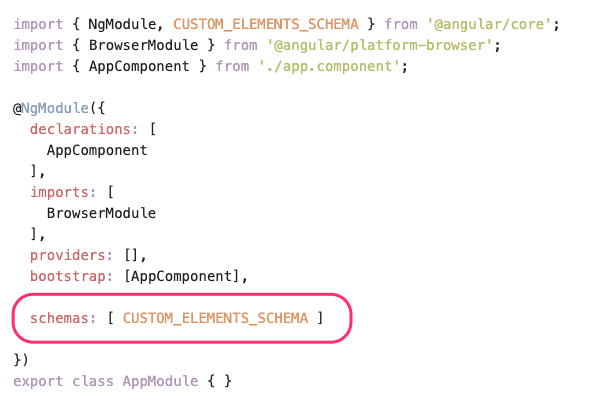
In
src/app/app.module.tsmake sure you have the following:import { NgModule, CUSTOM\-ELEMENTS\-SCHEMA } from '@angular/core'; @NgModule({schemas: [ CUSTOM\-ELEMENTS\-SCHEMA ]})Example
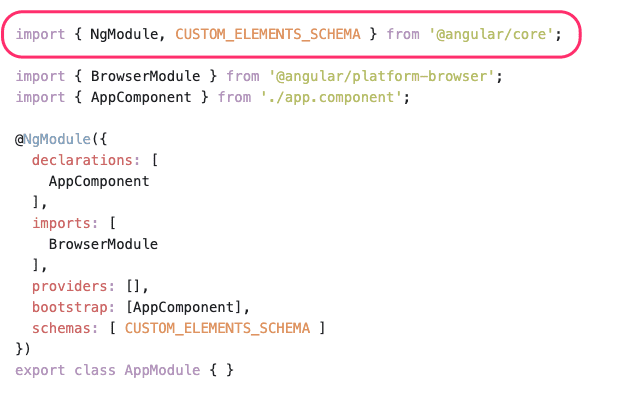
Example
-
Next steps: configure and customize the component
Note
It's important to configure the required parameters, and any optional parameters that you want to customzie. Make sure you read the documentation for the specific component you're integrating before implementing.
Lytx regularly updates the component-specific documentation as we continue to develop and improve related parameters and other functionality.
You’re there!
Vue JS installation
This section describes how to embed the reusable component when your project uses the Vue JS framework. Before starting, make sure you’ve fulfilled the prerequisites.
Installation steps
-
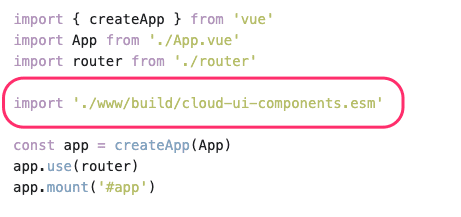
Import
www/build/cloud-ui-components.esm.jsinto your HTML for all HTML pages in your app that you want to integrate.Example
-
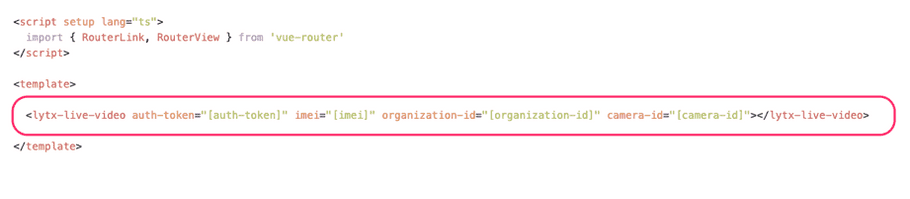
Add the component in all relevant places within your app. For example:
src/App.vueExample
-
Next steps: configure and customize the component
Note
It's important to configure the required parameters, and any optional parameters that you want to customzie. Make sure you read the documentation for the specific component you're integrating before implementing.
Lytx regularly updates the component-specific documentation as we continue to develop and improve related parameters and other functionality.
You’re there!